Notice:
The advice given on this site is based upon individual or quoted experience, yours may differ.
The Officers, Staff and members of this site only provide information based upon the concept that anyone utilizing this information does so at their own risk and holds harmless all contributors to this site.
<< Is it bad if the entire wires aren't tinned if the connections are done well? >>
I would definitely use tinned wire in saltwater applications. Also learn to crimp rather than solder.
You might want to start a new thread regarding your wiring. I know I can help you start, and my recommendation would be by discussing - one circuit at a time - .
Or the switch/fuse panel.
or the Solar Panel
Or the Battery.
Or the primaries and fuses to the panels.
But bite off one chunk at a time to discuss and try get your plan clear in you head before progressing.
IMHO The first thing I had to figure out on mine was how much power would I be able to supply, which was limited by my not being on a power dock and the size of my solar panel. So my boat is kinda wired like the demands for power they had in 1984... and without a power dock and as I'm not willing to spend $500 bucks on a bigger solar panel I'm constrained by my 12 watt solar panel input.
Like I said, I'm just soldering the ends so they are somewhat solid before using the crimped butt connectors with heatshrinked/waterproof sleeves. We have 110v 30amp at the dock and two batteries with I believe a 20amp dual batt charger maintainer. Side note, just picked these two triple clutches up for $240 for both. 1/4"-5/16" for the rope halyards and control lines.
supposedly just crimping is better than soldering because it does not put a hard spot in the wire. a good crimp especially with the heat shrink ends should be good. soldering wont stop moisture infiltration anyways as it will migrate between the insulator and the wire.
<< We have 110v 30amp at the dock and two batteries with I believe a 20amp dual batt charger maintainer >>
Sweet .. you've got the power!
You might want to take some pictures of your wiring/battery/panel setup for discussion... I'd love to see ideas on how to wire with a dock charger. ( and I expect power in from the engine )
DBuoY: serach out pbase maine. he has excellent how to articles, and goes into detail on wiring and crimps, etc. A GREAT resource when getting set up to tackle this project. We replaced almost every wire on Moe before selling her. It really was fantastic to turn on everything without glitch...
Sweet, definitely will check that site out. Just got another package(sorry for blowing this thread up). It's small, cheap and should work fine on the cabin top in tandem with the rope clutches.
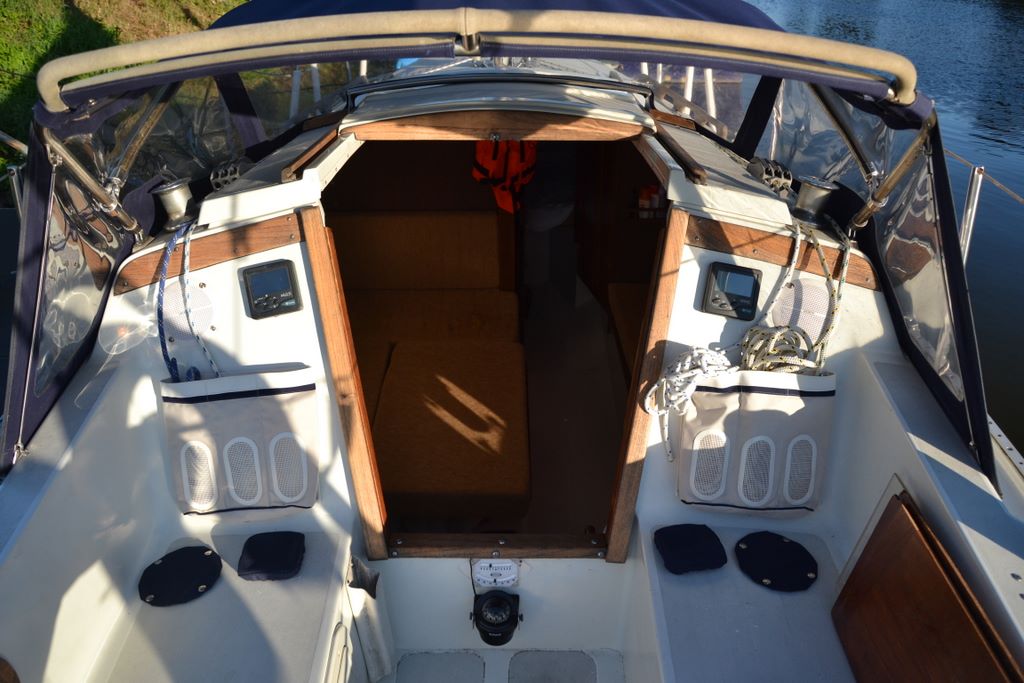
There are no stupid questions, It's the stupid one's that don't ask questions. If the search function was working you could get some good photos of the clutches installed but its not so... They are installed forward of the winches and open away from you. How far in front of the winch you say, Its best to play around with the location by putting some lines through the clutches and see how they feed to the winch. The straighter the line feeds to the winch the better and also not to far forward that they are difficult to reach. It's a compromise between the two.
I found an older but never installed Navico TP-10 Tiller pilot at a local marine consignment shop and installed it. Wow. What a difference the tiller pilot makes. Yahoo!. Next is a VHF radio with remote microphone. The VHF 8' whip antenna is mounted on the aft stbd corner of the cockpit.
Jealous!
Just got two of these guys in. Going to install them along with the bilge pump.
See, yours are shown mounted reverse to what I and others thought. I think they work differently to other clutches due to the design. Anyone else mounted these guys? Also, can I buy your dodger??
Robert, where did you get the cool voltmeters from?
eBay actually. I ordered two but only needed one because I didn't realize the PO wired a switch in so I have an extra. Just wired it tonight and I'm happy with the install. The wiring is kinda birds nesty from solar panel and alternator install but I plan on cleaning it up.
See, yours are shown mounted reverse to what I and others thought. I think they work differently to other clutches due to the design...
I don't think so... All responses and pictures have the handles pointing toward the cockpit and opening forward (away from the cockpit). That's how every clutch of every make on every boat of every size I've ever seen works.
Turns out the lewmar design is the opposite. They open towards you like in Thomas' photo. Tested with some line. They only grabbed in that direction.
I had a cover made to keep trash and bird **** out of boat. Also protects wood from excess damage.
Also, made a new hatch board to install a power vent. Discovered that hatch boards are not symmetrical. Looks like they are built for each boat individually. Got this idea from another member. Fan is a 110v computer cooling fan and runs 24/7 when shore power on. Thought about a timer, but could not come up good with a reason not to let it run. I have another spare to install when this one fails. Vent is a soffit vent with a bug screen.
That is interesting to see how they wire the catalinas on the build out. Everyone seems a little different. You apparently have two sets of jumpers on the dc, which is a good way to split up a circuit.
I never knew the lewmar clutches were mounted like that. ALso seems like a good way to do it, you can kinda fall forward on them to close them up.
Also, made a new hatch board to install a power vent. Discovered that hatch boards are not symmetrical. Looks like they are built for each boat individually. Got this idea from another member. Fan is a 110v computer cooling fan and runs 24/7 when shore power on. Thought about a timer, but could not come up good with a reason not to let it run. I have another spare to install when this one fails. Vent is a soffit vent with a bug screen.
Nice, similar to mine. Except I built a box around it to keep water away. I will say though, depending on if you have a speed regulator on the fan it will most likely surpass the air changes possible on the boat and stress the fan. Mine draws through the 5 or so slots on the original hatchboard and pushes forward to a 3 1/2" vent and with it on anything more then 1/4 speed it pressurizes (not much), but if you slide the companionway open a bit you can hear the fan give a big gasp of relief. That really is why mine is on a timer, I try to let it pump a big amount during 4 hours of the warmest point of the day then shut off. If you are running constantly at a low speed it should have the same effect.
Oh and if they still had the template for that cover and would be willing to make another, let me know, im interested!
Notice: The advice given on this site is based upon individual or quoted experience, yours may differ. The Officers, Staff and members of this site only provide information based upon the concept that anyone utilizing this information does so at their own risk and holds harmless all contributors to this site.