Notice:
The advice given on this site is based upon individual or quoted experience, yours may differ.
The Officers, Staff and members of this site only provide information based upon the concept that anyone utilizing this information does so at their own risk and holds harmless all contributors to this site.
I've found a 304SS piano hinge online at McMaster-Carr. Unfortunately, I won't be able to see it until I buy it, and it's not inexpensive.
I can buy it polished or unpolished, but the one that is polished is only polished on one side. The underside of the knuckles, which will show through the crack between the leaves and the center part of the table, is unpolished.
Do any of you have comments about how unpolished 304SS looks? My other choice is nickel plated steel, which will look nice and shiny. But I'm going to have to do some trimming of the hinge, and I'm concerned that I'll get corrosion on the unplated edges where I do the trimming. So that's why I'm considering SS instead.
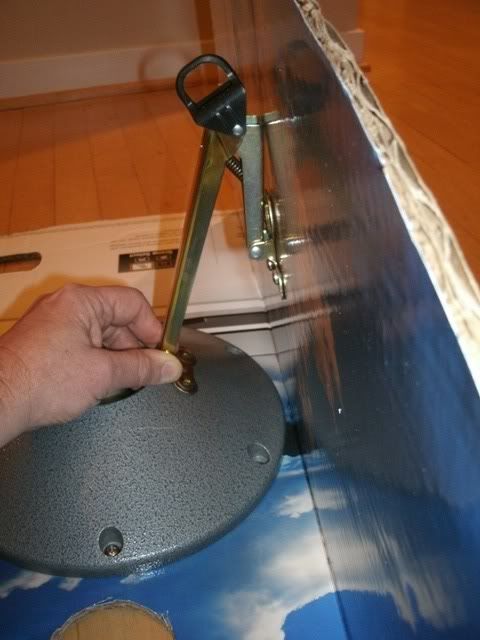
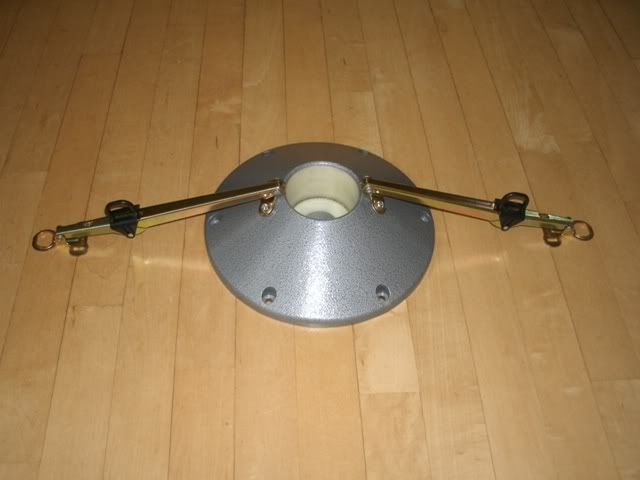
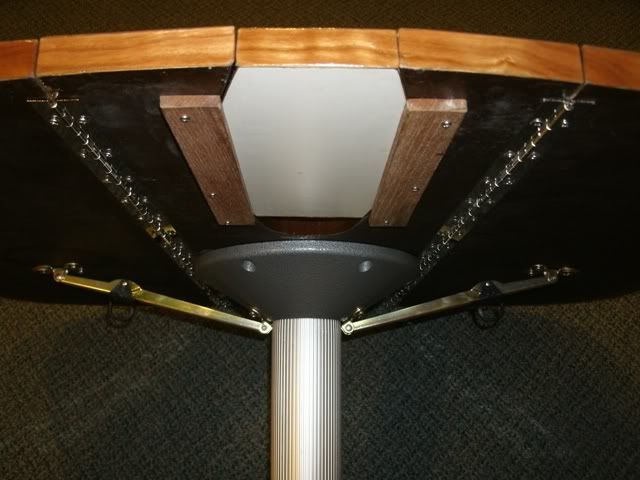
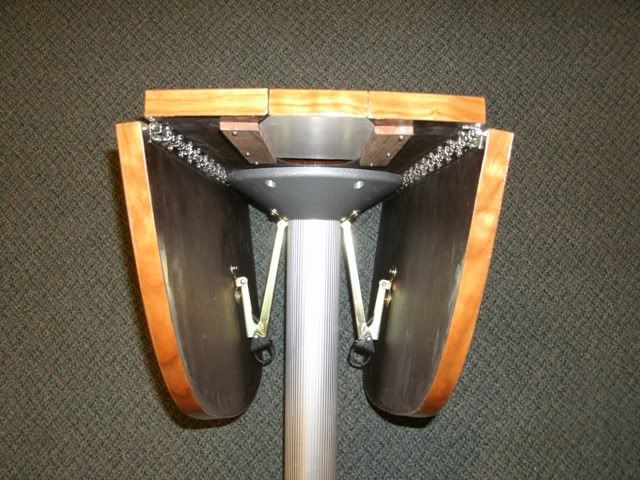
This project will be much simpler than I had feared. I can use a single bracket on each side, and attach them directly to the pedestal receiver under the table. I did some engineering calculations of the compressive forces generated on the brackets in this geometry, and everything is within the mfr's recommendations. You can also see that with this geometry the leaves drop down past vertical, so everything will work:
<center>
</center>
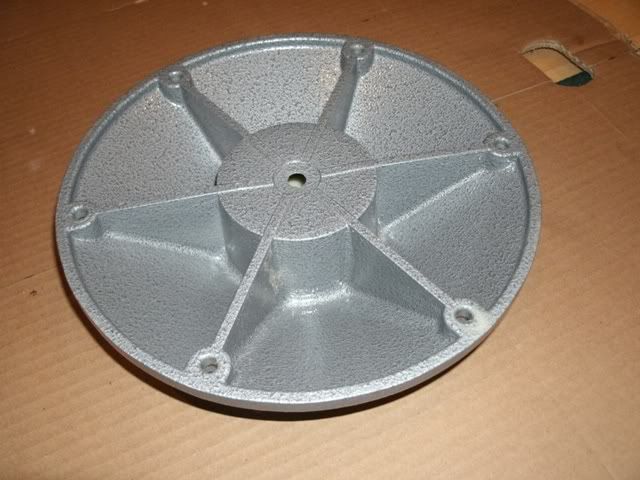
I was surprised that the pedestal receiver is not cast aluminum as I had thought. (The bottom one that mounts flush on/under the cabin sole is cast aluminum, so I thought this one would be too.) It is painted plastic instead, hollow with reinforcing "fins" for strength. This makes it potentially much easier to work with:
<center></center>
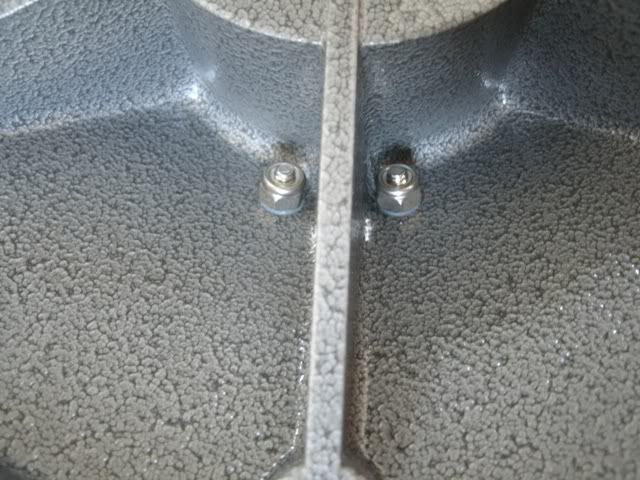
I'll "clock" the fins so that they are located directly under the braces (for maximum strength against the compression of the braces), and through-bolt the braces with nuts inside on both sides of the ribs.
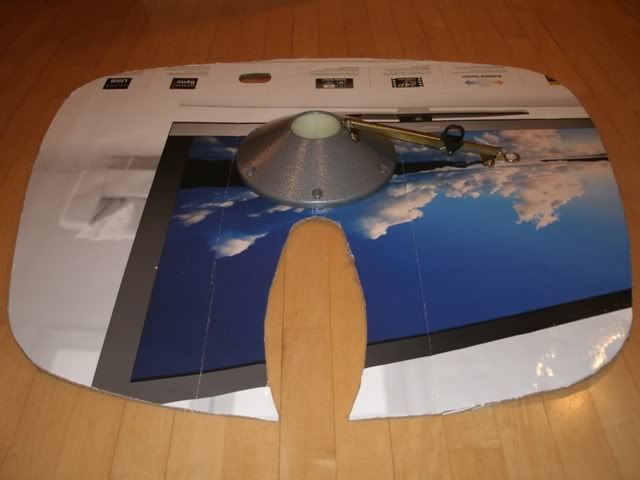
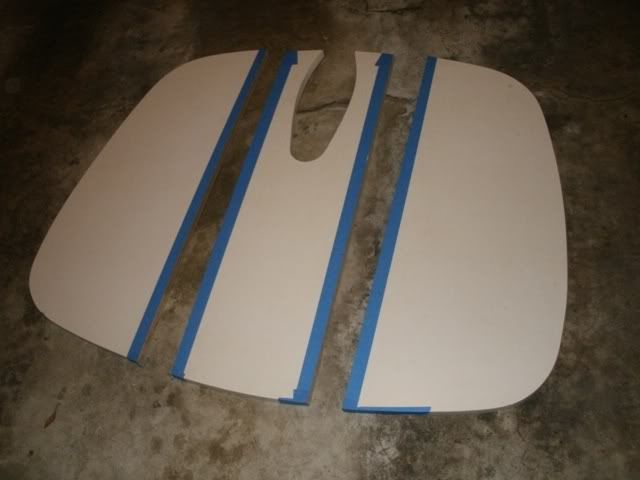
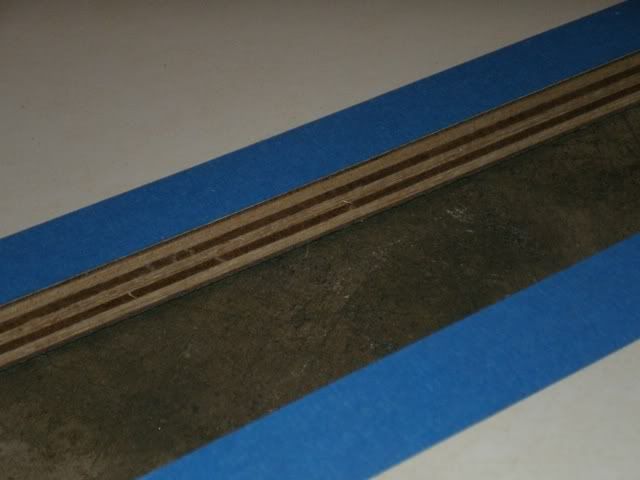
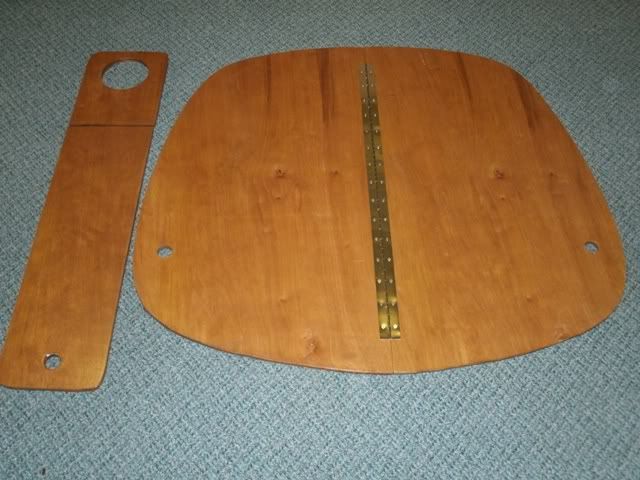
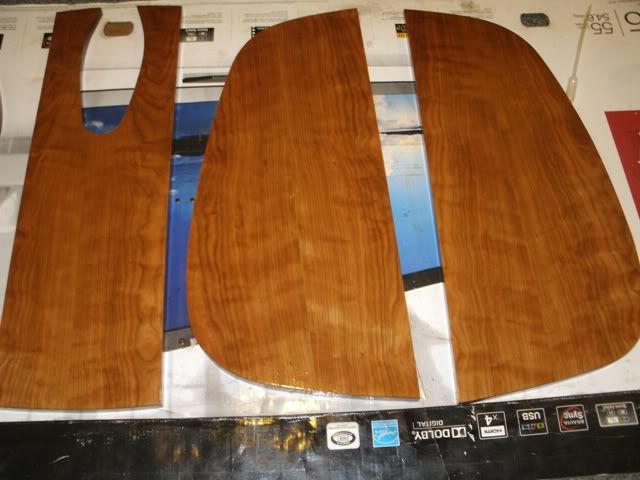
I finally got up the courage to chop the table last night. I've never used a circular saw before, but I c-clamped aluminum rails on both sides of the saw, so it was impossible to make a bad cut. It came out very clean. You can see that Catalina used pretty nice plywood under the laminate:
<center>
</center>
Since I haven't ruined anything yet , I went ahead and ordered cherry veneer with PSA backing. While I wait for it to come, I will need to seal the sawed off edges for good adhesion with the veneer.
I think that this is going to be a very nice modification, that so far is simpler and less expensive than I originally anticipated.
Plywood cut in half and piano hinged <hr height="1" noshade id="quote"></font id="quote"></blockquote id="quote"> I'm getting ready to cut out a new v-berth cover. I want to clearcoat it at the same time I do the table. I'm also going to make new bilge covers and veneer them to match the table.
I'm continually disappointed with the quality of plywood that I see at Home Depot (voids, warps, football patches, low ply count, uneven ply thickness, etc.), but not at all clear whether it really matters, and don't know where I could find a better quality. Did you use any special grade plywood for your cover, or just ordinary sheathing grade stuff? Pine? Birch? Sande?
Given its purpose, I don't think it matters. Having said that I'd go with one of the hardwood plywoods you mentioned only because it looks a little better and the cost isn't terrible. You could probably get cabinet grade plywood at a place like 84 Lumber but, I don't think it's worth the cost for this application.
What, in my opinion, matters are the number of ply's... the more the stronger. It should provide, for the area covered, little or no noticeable sag. Cut-off or left-overs of multiple ply (5 or more), plywood would be ideal and less costly. In case you have leftovers you may wish to add an extra shelf behind the head attached to the bulkhead and suspended from the wet-locker as per illustration
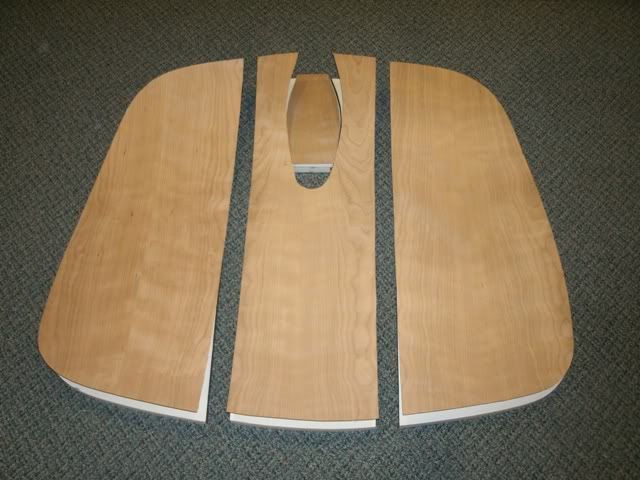
I'm still working on this whenever I get a chance. Last night I cut the veneer and made edge bands for the table. I have a few surface prep things to do before I actually stick it on:
<center></center>
I've been looking for 1/2" MDO board for the v-berth cover, since that's what Catalina used and it would need no finishing. I've found a couple sources (good quality local lumber yards), but they'll only sell me 4x8 sheet (over double what I need). I've called a few sign stores to see if they have scraps, but no luck yet. I did find a really nice 4x4 birch plywood at Lowes that is perfectly flat and much stiffer than the awful pine plywood that Home Depot had. So I'm probably going to go with that, but I'll have to finish it real well to help keep moisture out.
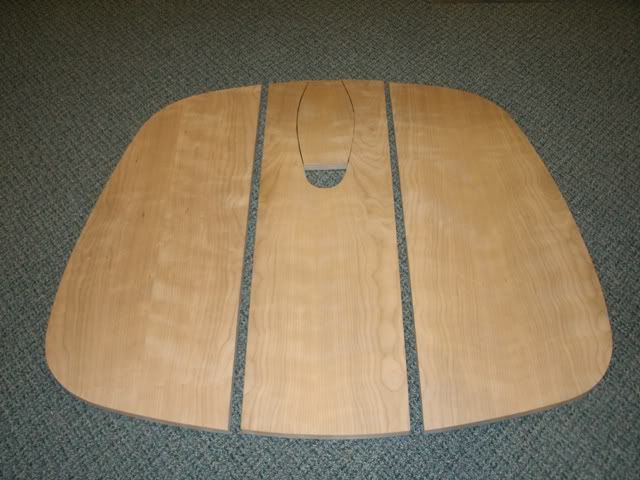
I finally applied the veneer and trimmed the edges. It looks great!
My test pieces with oil stain show that even with untinted clear oil, it's way too dark, even if I use a wood conditioner first. Applying a clear polyurethane directly over the cherry without any oil leaves a rich color that will darken over time, like all cherry. So that's what I'm going to do. First, I'm making test pieces to decide whether to pre-age the wood with a couple days in the sun (a suggestion made by a friend who's done a lot of custom cherry cabinetry for his C30 MkIII).
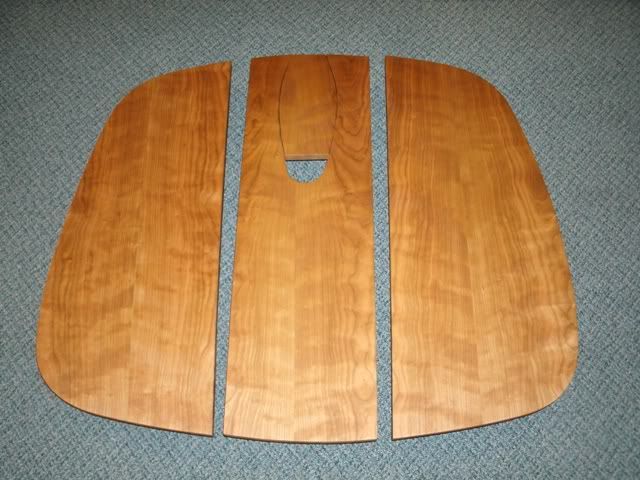
I pre-aged the wood with two days of sunlight, and applied pure tung oil to richen the color:
<center></center>
After a few days of drying/curing, I'll apply polyurethane clear over top. I considered multiple coats of tung oil for a natural finish, but decided that I need the extra durability of polyurethane over top the relatively fragile veneer.
While waiting for the oil to cure, I'll get to work on the hardware (brackets and piano hinges) and also finish up the hinged v-berth cover and a new bilge cover.
<blockquote id="quote"><font size="1" face="Verdana, Arial, Helvetica" id="quote">quote:<hr height="1" noshade id="quote"><i>Originally posted by JimGo</i> <br />Rick, did you consider an epoxy coating instead of the poly? It's even more durable, and more likely to seal out any water. <hr height="1" noshade id="quote"></font id="quote"></blockquote id="quote"> I have some experience with 2-part epoxy, but not in a furniture topcoat application. I have a lot more experience with polyurethane as a topcoat.
I agree that epoxy is much harder, has great adhesion, forms a more impermeable barrier, but not so great for UV exposure, and can get so hard as to occasionally be brittle in thin films. Polyurethane will yield a little more before cracking (thus very durable and resilient), and in the marine environment the expansion and contraction of the wood due to moisture and temperature fluctuations is a concern. I think the PU may work better than epoxy in that environment.
I'm sure that there are many variants on epoxy which modify its properties, but for this project I'll stick with what I know.
The last couple of weeks have slowed down because the finishing process is so time consuming. I've finished the birch pieces - a hinged v-berth cover and replacement bilge covers. The top sides, which were a reddish birch veneer, were finished with golden oak stain to give a golden hue similar to the cherry/tung oil table, followed by a touch of cherry stain. The bottom sides were a white birch veneer, so I chose a more reddish lacquer-based stain (nasty stuff!) that was sitting around left over from a cabinet replacement that I did 30 years ago. The stain was overcoated with satin polyurethane. The piano hinge is actually nickel plated - the yellowish brass color that you see here is caused by reflection from the ceiling:
<center></center>
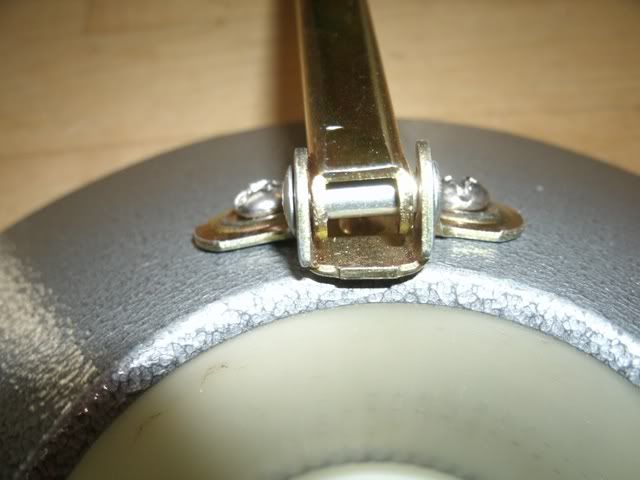
While waiting for multiple coats of clearcoat to dry on the table pieces, I went to work assembling the all-important drop leaf hardware. I "clocked" the pedestal receiver to ensure that the brackets were located right over the internal ribs for maximum strength. If you look closely you'll see nylon washers under the lock nuts. This was done to provide a little cushion to ensure the nuts did not crack the plastic that they are resting on. I also bent the bracket attachments slightly to ensure that they conformed to the contour of the conical shaped receiver. The whole idea is to spread the stresses out evenly so you don't crack the plastic (even through it appears to be very durable Delrin material):
<center>
</center>
My first attempt to overcoat the table with polyurethane ran into some problems. I had let the tung oil dry for 10 days, but despite this when I overcoated with PU it was still sticky after 2 days. At the same time I had coated the birch plywood for the bilge cover, and that cured great in 24 hours, so I know the paint was OK - something was definitely going wrong because of the pure tung oil that I had applied to the table. I soaked it with mineral spirits and wiped off the uncured PU, then waited a couple days for things to dry. Before trying again, I soaked with mineral spirits again and wiped it off to hopefully leach out any excess oil from near the surface. But the second try had the same problem. So I bought some Japan Drier, dissolved about 2% into mineral spirits, and brushed this on top, hoping it would diffuse into the tung oil to kick off some curing. It worked. The subsequent coats of PU cured fine, and I sanded each time to smooth out the imperfections.
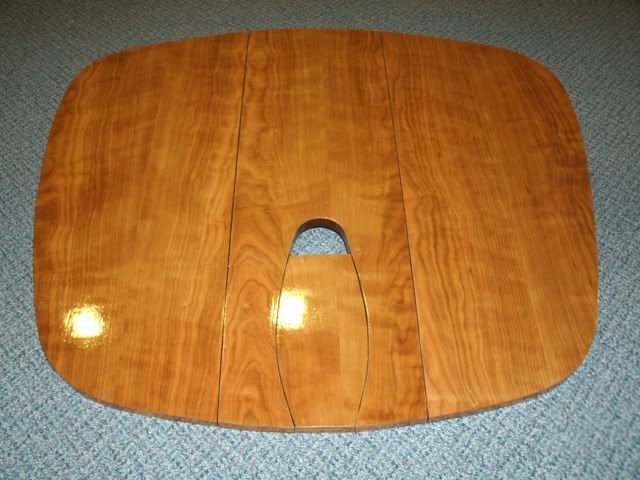
Although things were looking good, the veneer grain always had a deeper sparkle when the veneer was wet with PU or mineral spirits, but the sparkle went away as soon as it dried. I decided that the flatting agents in the satin PU were diffusing the light too much and interfering with the glamor of the finish, so I bit the bullet and switched to high gloss PU. After 2 very thin coats, it's looking spectacular. It's more gloss than I really want, but if that's what it takes to make the grain sparkle, I'll live with it (and maybe buff down the gloss a little later):
<blockquote id="quote"><font size="1" face="Verdana, Arial, Helvetica" id="quote">quote:<hr height="1" noshade id="quote"><i>Originally posted by Prospector</i> <br />For the V-berth cover, give these folks a call and see what they have and if it can be shipped:
http://www.noahsmarine.com/ <hr height="1" noshade id="quote"></font id="quote"></blockquote id="quote"> It's finished. I used leftover materials from other projects. Nothing left to buy.
I finally got everything assembled with the hardware a few days ago. The finish came out great - the grain just sparkles. In the first pic, the perspective makes the table look more squared off than it actually is. Since it is still the original table (despite the modifications), it is actually much wider toward the stern than it is toward the bow. I'm going to let everything cure for another week or so before taking it down to the boat. No rush, since I'm blocked in on the hard and won't be able to splash for at least a few weeks:
This was a 2-month job for me (partly due to restricted hours each day), but 95% of the hassle was because of my choice to veneer over the original laminate finish, followed by the requisite finishing of the veneer. The primary benefit is greater access to the v-berth and settee storage from the narrower table with the leaves down, and that part of the modification took only 2 days.
For those who are fortunate enough to already have a wood table (which I believe Catalina started including in the '99 model year and after), this is a much simpler job. Cut the table, seal the edges, buy/apply wood veneer edge banding that matches the table, varnish it, and buy/attach piano hinges and drop leaf hardware. A big benefit for relatively little work and $40-50 of cost. Just be careful to do it right, since you are cutting up OEM equipment.
Paul <hr height="1" noshade id="quote"></font id="quote"></blockquote id="quote"> I have the bimini frame, boom, and gin pole stored in the cabin, and I don't want to put the table down there with them because of the inevitable collisions, scratches, and gouges that would occur when I go to remove them. So I'll install it after I raise the mast. Before I do that, I need to replace halyards (Novatech XLE), install CDI furler ball bearing kit, shorten the forestay to reduce rake, check masthead light continuity, etc. So it will be at least a week.
I'm curious about the shortening of the forestay to reduce rake. Is the reason to lessen weather helm issues? Is this an effort to see if it helps or to follow someone who has reported it helps?
My reason for asking is IIRC (it has now been many years) someone tried it very early on after the 250 was released and reported to the forum no benefit to the weather helm issue. And... from what has been learned since that time, I believe his observation was accurate.
Notice: The advice given on this site is based upon individual or quoted experience, yours may differ. The Officers, Staff and members of this site only provide information based upon the concept that anyone utilizing this information does so at their own risk and holds harmless all contributors to this site.