Notice:
The advice given on this site is based upon individual or quoted experience, yours may differ.
The Officers, Staff and members of this site only provide information based upon the concept that anyone utilizing this information does so at their own risk and holds harmless all contributors to this site.
Finally replaced my windows yesterday. It turned out to be a bigger job than expected. As usual.
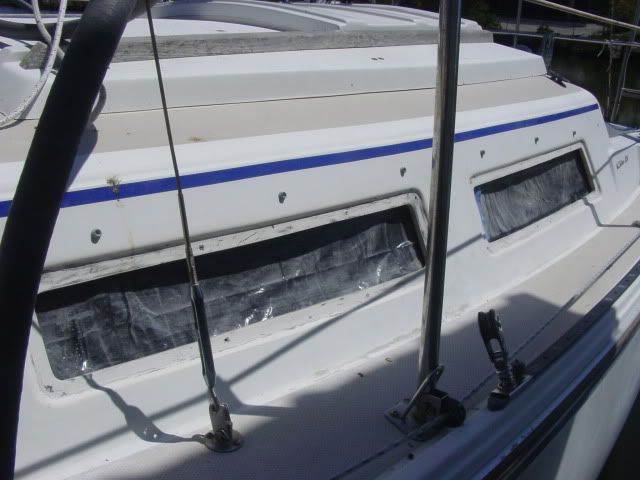
Removed old windows and sealant:
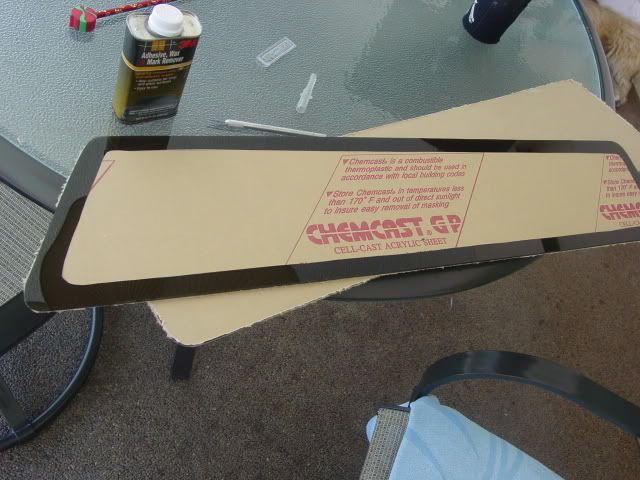
Made a template of the old windows, and cut new replacements. Took the windows down to the boat and removed the protective paper where the sealant will go.
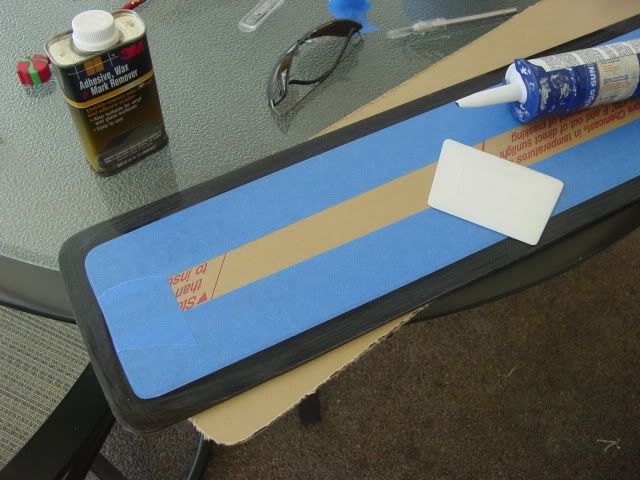
One of the things that made the old windows look bad was that when the PO replaced them, he only put a bead of sealant on the inside of the windows. This was visible from the outside. To combat that I squeegeed some sealant on the window for a uniform look on the outside. Then another bead of sealant and install the windows.:
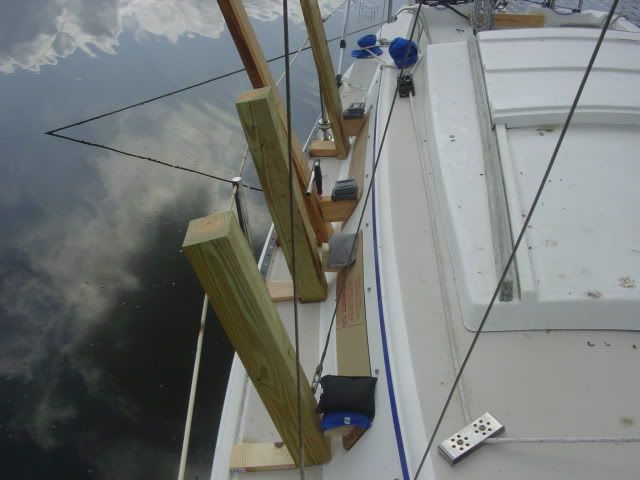
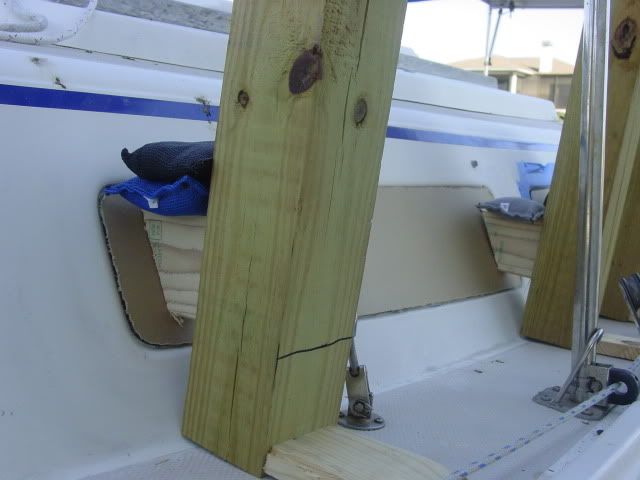
One of the difficult tasks was to figure out how to hold the windows in place while the sealant cured. This is what I came up with, with some scrap lumber and dive weights.:
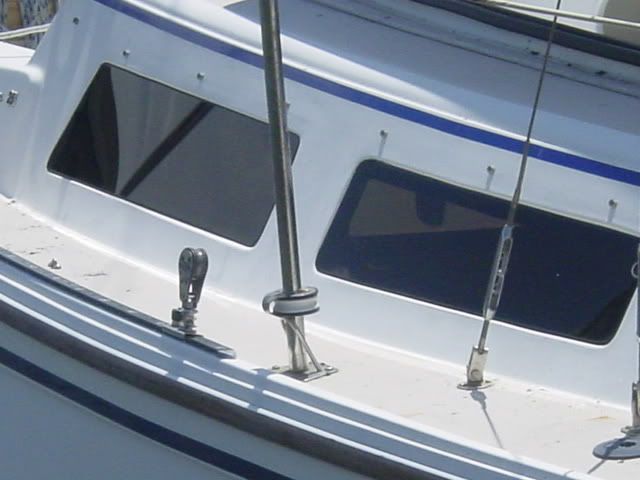
I covered the windows with some towels to keep them from getting wet overnight from dew. The paper is difficult to remove if it gets wet. The next morning removed the lumber and weights, taped off exterior part of windows, ran a bead of sealant around edges of the windows and then removed the tape and paper. Now I have factory looking fresh windows.
Today's project is buff and wax the topsides, whew.
Davy J
2005 Gemini 105Mc PO 1987 C25 #5509 SR/SK Tampa Bay
My windows are getting crazed and I will have to do this project someday too. What did you use to remove the windows and how difficult was it to get the old windows out?
Three windows popped right off. The last one, of course, would not give up the fight, it broke into very small pieces. If I had to do it again, I would use a multi-tool. Removing the old sealant was the most difficult part.
WOW - the newer windows are a joy as compared to the older style...just curious - is the sealant the only thing holding he windows in place..no screws/clips/tabs at all ? ?
<blockquote id="quote"><font size="1" face="Verdana, Arial, Helvetica" id="quote">quote:<hr height="1" noshade id="quote">is the sealant the only thing holding he windows in place..no screws/clips/tabs at all ? ?<hr height="1" noshade id="quote"></font id="quote"></blockquote id="quote"> The sealant is the only thing holding the windows. <blockquote id="quote"><font size="1" face="Verdana, Arial, Helvetica" id="quote">quote:<hr height="1" noshade id="quote">What sealant did you used for that acrylic?<hr height="1" noshade id="quote"></font id="quote"></blockquote id="quote"> The sealant is Dow Corning 795. From a little research, it is the same sealant Catalina uses to secure windows, on current boats, without fasteners.
Beautiful! I need to do that job on my boat. Do you have any tips on how you removed the old sealant? Did you use a special tool, or just scrape, scrape, scrape with a putty knife?
I'm wondering if the DC 795 sealant is the same stuff they use to adhere replacement windhsields in cars. If it is I bet a glass company that does windshields has something that will help remove it.
Davy, windows look good. Was over on your coast this weekend (Mad Beach), was coming back over the Howard Franklin and was wondering if you were out enjoying the wind. (maybe not sailing, but it looked like you were having "fun") tc
<blockquote id="quote"><font size="1" face="Verdana, Arial, Helvetica" id="quote">quote:<hr height="1" noshade id="quote">How did you cut the replacements?<hr height="1" noshade id="quote"></font id="quote"></blockquote id="quote"> First, I made a template out of 3/4" plywood. You only need two, as both sizes of the windows are the same on the two sides of the boat. Then I used a 3-fluted trim bit in a router to cut the acrylic. The acrylic gets clamped to the template, after you cut one side, you then move the clamps and then cut the other side.
<blockquote id="quote"><font size="1" face="Verdana, Arial, Helvetica" id="quote">quote:<hr height="1" noshade id="quote">(maybe not sailing, but it looked like you were having "fun")tc<hr height="1" noshade id="quote"></font id="quote"></blockquote id="quote">
Well, I was buffing and waxing the topsides today. No sailing, however, weather forecast was 10-15 turned out to be 15- gusting to 25. But we will be having fun in two weeks....sailing down the west coast for 17 days. However, I already need a "vacation" from my "vacation".
Here are the Catalina Dwgs for replacement windows. I also had made a template of the old window that I was considering replacing since it had a crack in it. No water entered thru the crack but I sealed it just in case. Catalina Sailboats made me a replacement window from the tracing I sent to them. I have procrastinated replacing the window and the old one has held up fine. But I have the new window laying in the VBerth area for that day when I get the urge to replace it.
Catalina indicated that years ago, they did away with the screws because sometimes the window woud crack when the screws were tightened. They found the Dow 795 sealant excellent for sealing and holding the windows. The sketch shows how to also apply weight against the window to ensure the sealant seals properly. Though, Davy seems to have come up with an equally good approach.
I bought my first boat about a month ago and resealing the windows has been my first project I'm almost finished. It wasn't too terribly difficult but I have the aluminum style window and I used the kit from catalina direct. Replaced two and thought the others were ok turns out they are not so I'm about to start the others.
Thomas your post info is great!!! I started taking one of three cracked windows out and got about 1/3rd of the window loose after 2 hours of messing with a box cutter and putty knife. I thought there must be a better way to get the old windows out. My next idea was to use my dremel. Then I thought about an oscillating saw. Does it look like the following tool might make it easier? http://www.northerntool.com/shop/tools/product_200441013_200441013
I called my local Binswager glass shop and they said if I brought the dimensions or the old window they would cut new ones for $36.00 each. Not sure if they were talking plexiglass or lexan though. How does that compare with the cost of your lexan? Your windows look awesome!
The care and thought that went into this project really shows David. Also serves as an excellent tutorial for others. Thanks make the time and affort to share.
I used regular cell cast acrylic sheet. It can be scratched easier than polycarbonate (Lexan) but the scratches can be polished out. I replaced some portlights on an old power boat with polycarbonate, and after a few years they were looking bad so this time I went with regular acrylic. Only time will tell.
I have finally started my window replacement, 9 years after buying the boat with both of the front windows cracked. NOTE: Quiet Time is an '88 C-25 so she has the frameless acrylic windows. Here's how I got the old windows off:
1. Using a sharpened 2" putty knife with the corners rounded off, I first opened a gap at the bottom forward corner of the window. This takes about 2 minutes of pushing and wiggling the knife blade through the sealant from the inside of the boat.
2. Next, take an 18" length of Type 304 S.S. Safety wire (the kind you should already have on your boat to secure turnbuckles), and stick one end through the gap you made with the putty knife. Make a loop in each end big enough to stick a screwdriver blade through.
3a. If you have a helper: Each person grabs a screwdriver handle, one inside and one outside the boat, and pulls the wire along the joint, It takes about 40 pounds of sustained force to slice through the cured sealant, but this quickly and efficiently does the job - FAR faster than trying to cut out the window entirely with a putty knife. I got the idea from watching guys at an auto glass shop cutting broken windshields out of cars. In less than 5 minutes you should be able to cut the window completely free.
3b. If you don't have a helper. Use a screwdriver handle on the inside only. On the outside, run a 1/4" line from the loop in the end of your wire aft to the cockpit winch, a cleat, or the stern pulpit. Start with all of the slack wire OUTSIDE. Go inside, grab the screwdriver handle and pull upwards/backwards with enough force to cut the sealant. You will be able to cut 7"~8" of sealant at a time assuming you used 18" of wire. Keep doing this, re-setting the line to the cleat until you have cut the entire bottom seam. Experiment with pulling angle to get the most efficient cut with the least effort. After cutting to the aft end of the bottom horizontal seam, cut the vertical seams with your putty knife (it's too difficult to use the wire on the short seams without a helper). Next, pull the wire around to the Top front of the window, re-rig your outside line, and cut the top seam all the way to the back. Total time for one window, working alone without a helper: 15 minutes with the wire vs. 2 hours with the putty knife.
Removal of the old sealant. I tried scraping it off with the putty knife, but it took forever and I was exhausted after only 1 window. I guess I will try the wire brush on an electric drill trick.
QUESTION: How much sealant does one need to buy for the whole job (all four C-25 windows) ? The sales rep at Catalina Direct didn't know. I want to make sure I have enough before I get started, but at $17 a cartridge, I sure don't want to buy more than I need.
PRICE OF NEWWINDOWS: Tap Plastics in Sacramento is making all four windows for $225 (August 2012). This includes beveling the edges and drilling 4 holes in each window (I will secure them with screws temporarily at the corners, then remove the screws and seal the holes when the sealant is fully cured).
Larry, this sounds brilliant! I too started and have not finished my windows. I got the replacement plastic, and started removing the old sealant, then figured there must be a better way, than the tedious putty knife method. A status report on your progress will be most welcome. Doug
I like the wire idea for removing the caulk; the oscillating tool is also a good tool we use. Razor blades are the cheapest and easiest. Don't waste time on any kind of caulk removers, as I don't know any that work well. Best cleanup is xylene (Goof Off), MEK/acetone or denatured alcohol.
Polycarbonate is strong, but it crazes quickly in the sun. I put Lexan in a foredeck hatch on my previous boat because it was frequently stepped on. It supported my 190 pounds well, but it was an ugly equivalent of frosted within two years.
Old sealant is EASILY removed with special citrus smelling products that break down the polymerized cures. Silicone and polyurethane curl up and peal away in minutes. Polycarbonate, Lexan and two part epoxies are softened or glazed on contact, beware. Acrylic windows like Lucite shouldn't be affected.
<blockquote id="quote"><font size="1" face="Verdana, Arial, Helvetica" id="quote">quote:<hr height="1" noshade id="quote">Polycarbonate is strong, but it crazes quickly in the sun. I put Lexan in a foredeck hatch on my previous boat because it was frequently stepped on. It supported my 190 pounds well, but it was an ugly equivalent of frosted within two years. <hr height="1" noshade id="quote"></font id="quote"></blockquote id="quote">
I hate to here that-I just replaced my forward hatch with lexan. That is what the plastic supplier recommended.
<blockquote id="quote"><font size="1" face="Verdana, Arial, Helvetica" id="quote">quote:<hr height="1" noshade id="quote">QUESTION: How much sealant does one need to buy for the whole job (all four C-25 windows) ? The sales rep at Catalina Direct didn't know. I want to make sure I have enough before I get started, but at $17 a cartridge, I sure don't want to buy more than I need. <hr height="1" noshade id="quote"></font id="quote"></blockquote id="quote"> I purchased two 10.3 oz tubes of Dow Corning 795, but only used one. You would not need to use screws to hold the windows in place if you come up with some weight like I did.
<blockquote id="quote"><font size="1" face="Verdana, Arial, Helvetica" id="quote">quote:<hr height="1" noshade id="quote"><i>Originally posted by hewebb</i> <br /><blockquote id="quote"><font size="1" face="Verdana, Arial, Helvetica" id="quote">quote:<hr height="1" noshade id="quote">Polycarbonate is strong, but it crazes quickly in the sun. I put Lexan in a foredeck hatch on my previous boat because it was frequently stepped on. It supported my 190 pounds well, but it was an ugly equivalent of frosted within two years. <hr height="1" noshade id="quote"></font id="quote"></blockquote id="quote">
I hate to hear that-I just replaced my forward hatch with lexan. That is what the plastic supplier recommended. <hr height="1" noshade id="quote"></font id="quote"></blockquote id="quote">
To preserve that Lexan hatch as long as possible, you should make a cover for it for when you are not using the boat, same as you keep your sails covered. A double thickness of Sunbrella would work best and would last longest.
<blockquote id="quote"><font size="1" face="Verdana, Arial, Helvetica" id="quote">quote:<hr height="1" noshade id="quote"><i>Originally posted by rrick</i> <br />Old sealant is EASILY removed with special citrus smelling products that break down the polymerized cures. Silicone and polyurethane curl up and peal away in minutes. Polycarbonate, Lexan and two part epoxies are softened or glazed on contact, beware. Acrylic windows like Lucite shouldn't be affected. <hr height="1" noshade id="quote"></font id="quote"></blockquote id="quote">
Can you name the "special citrus smelling" products? I am about to replace my windows and getting the sealant off is not something I am looking forward to.
Lcharlot - thanks for the wire cutting tip! Please post how you remove the sealant. I was going to use a wire brush on a drill.
Notice: The advice given on this site is based upon individual or quoted experience, yours may differ. The Officers, Staff and members of this site only provide information based upon the concept that anyone utilizing this information does so at their own risk and holds harmless all contributors to this site.