Notice:
The advice given on this site is based upon individual or quoted experience, yours may differ.
The Officers, Staff and members of this site only provide information based upon the concept that anyone utilizing this information does so at their own risk and holds harmless all contributors to this site.
So I bit the bullet and finally replaced the old dinette table on Passage.
The original was a "wood look" formica wrapped MDF table that had seen better days and way too many rains and soaks. The MDF swelled up and the formica fell off and had to be reglued several times.
Another problem with the original table is that it's WAY too big for the space and it crowded the entire cabin - both the aisleway and the seating area.
So I found a great little raw wood shop in Milford CT and picked up a legal teak board at 80" x 6" x 5/4" for about $25 per board foot. They put it on their two-sided planer and trimmed off about 1/16" on both sides, so the finished piece is slightly thicker than 1".
I measured the space using my crib-boards as a guide and liked the idea of a tapered angle on the sides. Now with a shorter length and a tapered edge, there's plenty of seating room, a lot more walking space. Now you can actually sit on the dinette seats - without having to squeeze into a little slot. And the table is still ample enough for my iPad or PC and a drink or two...
I used my table saw to cut the wood. My son who's a woodworker asked how I calculated the angles and I said I didn't. I just used a centerline on each piece and measured 27" on one edge and 26" on the other of the first piece, 26" on one edge and 25" on the other, then 25" and 24" on the third. I set the angle jig to accommodate the cuts.
Once I had all three pieces, I lined them up and hand trimmed the sides to get them even and smooth due to the kerf of the saw. I joined them using waterproof glue and two hardwood straps underneath. I quarter-rounded the edges of the straps and glued and screwed. I did not need to dowel the boards since the straps and glue are holding firm.
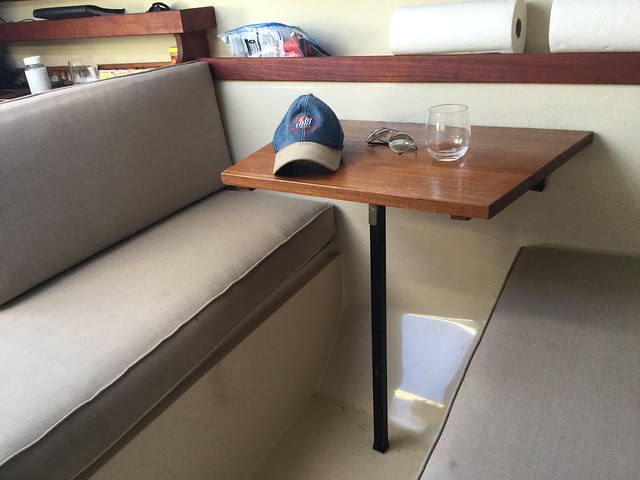
I reattached all the hardware but I'm not too happy about that ugly black metal leg. Any suggestions on how best to replace it?
Here's a shot from the starboard settee.
You can see the other teak trim above ... and my USPS insignia hat. I just got some new flares.
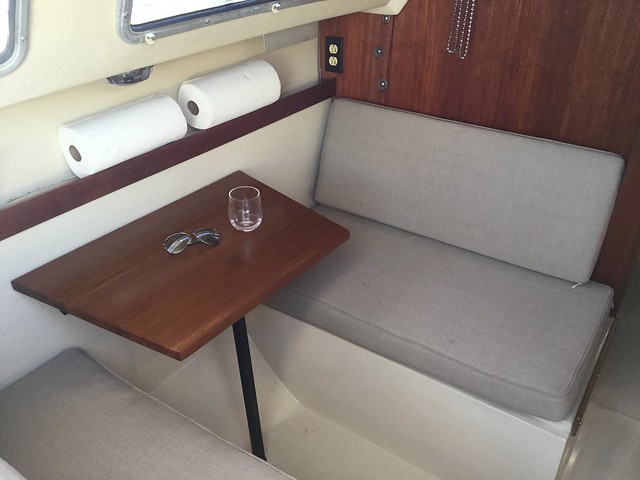
Here's a shot from the companionway.
You can see my Key West love beads in the background there too.
Nice work! I never did like that big brown thing you apparently wrecked. Were you using the old table as part of an athwartship double berth? If so, now what...?
Dave Bristle Association "Port Captain" for Mystic/Stonington CT PO of 1985 C-25 SR/FK #5032 Passage, USCG "sixpack" (expired), Now on Eastern 27 $+!nkp*+ Sarge
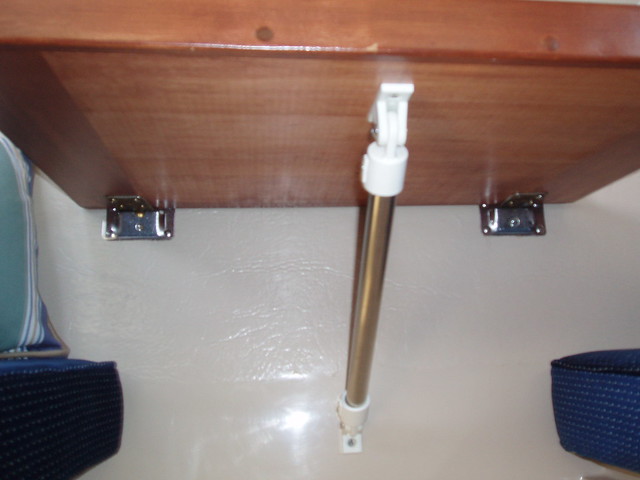
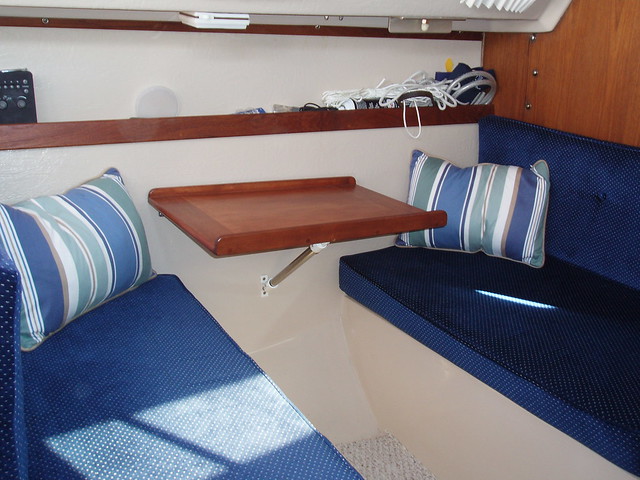
Whoo Hoo Bruce! Boy that looks familiar. Somebody must have had a brilliant idea I like the angled sides. Nice improvement. I too re-used the hanging hardware from my large ugly table. Really opens things up nicely and as you said makes sitting down inviting rather than an ordeal. You can cut a piece of plywood to span the two seats if you do ever use the area as a bed. Just put it under the forward V berth cushions for storage. I didn't like the straight down leg either, Thought it would get kicked so I used some Bimini fittings and some old tubing that I had and angled the support off the wall. 7/8 or 1" wood dowel would work also. You could replace the little set screws in the Bimini mounts with thumb screws so it would be easy to remove and use the insert for a bed. Nice job! Your going to love it.
quote:I never did like that big brown thing you apparently wrecked.
I think Dave's on to you Bruce
Scott-"IMPULSE"87'C25/SR/WK/Din.#5688 Sailing out of Glen Cove,L.I Sound
Funny Dave Even though the old table has been through the mill, it's still pretty indestructible so I kept it to use for the in-betweener for the queen size air mattress. It fit perfectly in the quarterberth under the cockpit. I reglued the Formica yet again.
we're redoing our traditional table to a swing down with piano hinge. I did see from the first photo a great place to fit the 110 elect. outlet that we're also working towards. Projects will be at a stall as hubby is having surgery tomorrow. thanks for the pics every one.
Lynn Buchanan 1988 C25 SR/WK #5777 Sailynn Nevada City, CA
Notice: The advice given on this site is based upon individual or quoted experience, yours may differ. The Officers, Staff and members of this site only provide information based upon the concept that anyone utilizing this information does so at their own risk and holds harmless all contributors to this site.