Catalina - Capri - 25s International Assocaition Logo(2006)  
Assn Members Area · Join
Association Forum
Association Forum
Home | Profile | Register | Active Topics | Forum Users | Search | FAQ
 All Forums
 Catalina/Capri 25/250 Sailor's Forums
 Catalina 25 Specific Forum
 Rebuild Mast Step

Note: You must be registered in order to post a reply.
To register, click here. Registration is FREE!

Screensize:
UserName:
Password:
Format Mode:
Format: BoldItalicizedUnderlineStrikethrough Align LeftCenteredAlign Right Horizontal Rule Insert HyperlinkInsert EmailInsert Image Insert CodeInsert QuoteInsert List
   
Message:

* HTML is OFF
* Forum Code is ON
Smilies
Smile [:)] Big Smile [:D] Cool [8D] Blush [:I]
Tongue [:P] Evil [):] Wink [;)] Clown [:o)]
Black Eye [B)] Eight Ball [8] Frown [:(] Shy [8)]
Shocked [:0] Angry [:(!] Dead [xx(] Sleepy [|)]
Kisses [:X] Approve [^] Disapprove [V] Question [?]

 
Check here to subscribe to this topic.
   

T O P I C    R E V I E W
redeye Posted - 03/13/2019 : 05:22:02
So anyhoo....

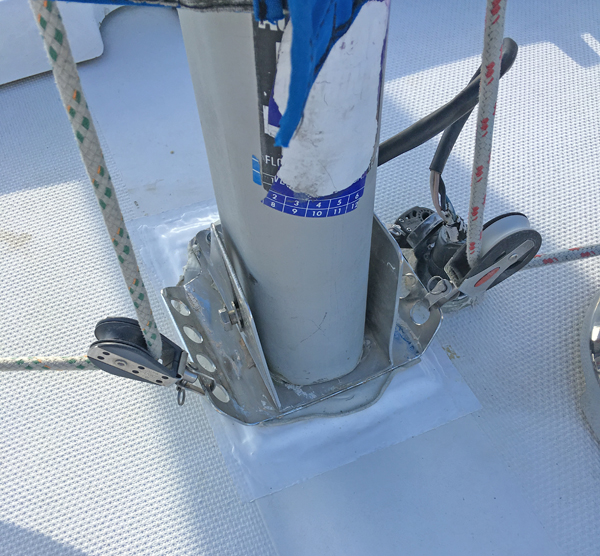
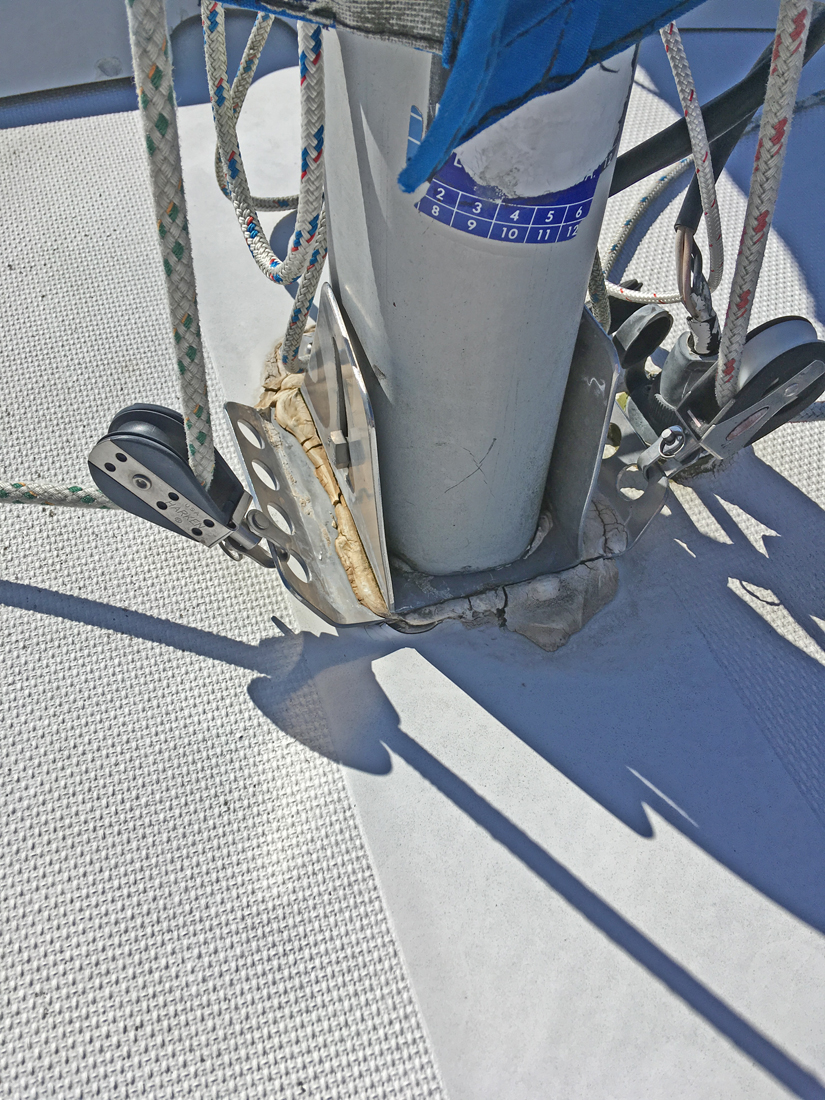
The area under the mast plate ( what is that area called? ) is cracked, caved in some, and I would guess it is leaking into the deck. Not good. Right now I've got it gooped up with polysulfide thats probably 5 years old.. again not good.

So I want to drop the mast and build up the area with G-flex.

My problem is that my midstays are almost all the way out so I expect I might have to cut off an inch of the bottom of the mast if I build up the area a half inch. I also have extension shackles on my forestay.


SO thinking out loud to hear your most interesting opinions before I attempt this project at the end of this month.


regards.ray

25   L A T E S T    R E P L I E S    (Newest First)
redeye Posted - 03/31/2019 : 16:42:00
<< Be another month before I'm in the water. >>

Thank you Scott.. and I'm sure the month will go fast, with all the spring projects you probably have. I try to enjoy the spring while I can, the summer gets so hot ( and our lake full of powerboats and their wakes ) that June, July, and August are often windless on my inland lake.

It was just so much fun yesterday setting the little jib in tight, tightening the topping lift to open the mainsail and setting the tiller tamer. Then I'd let out the mainsheet until the boat would hold its bearing. Self steering. If it fell off the wind in the main would bring it back up and if it turned up the main would luff and the jib would bring it back down. I really like the new, larger wind chicken...

It's unusual for us to have a strong steady warm breeze from the South. Usually we sail on fronts moving in blustery from the WNW clocking to the NNE.
islander Posted - 03/31/2019 : 12:08:52
Looks great Ray, So that's one project you don't have to think about anymore. Be another month before I'm in the water.
redeye Posted - 03/31/2019 : 10:20:31
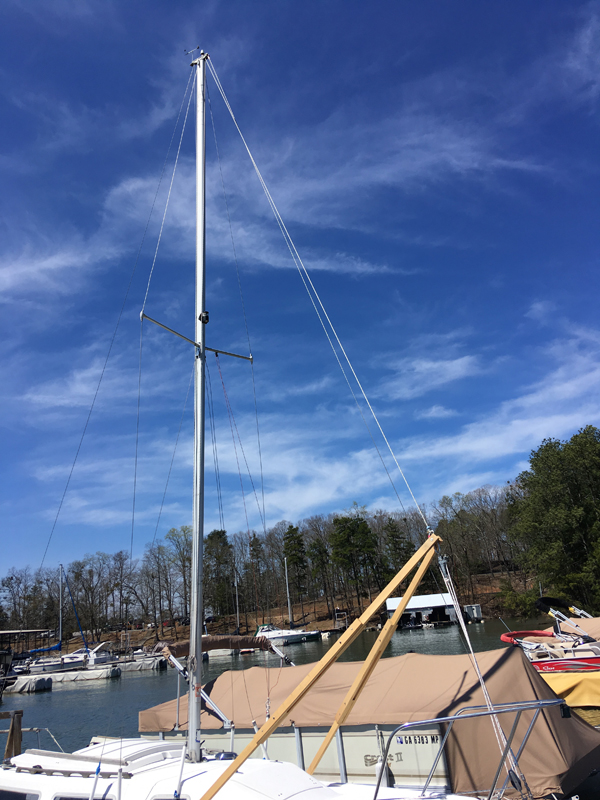
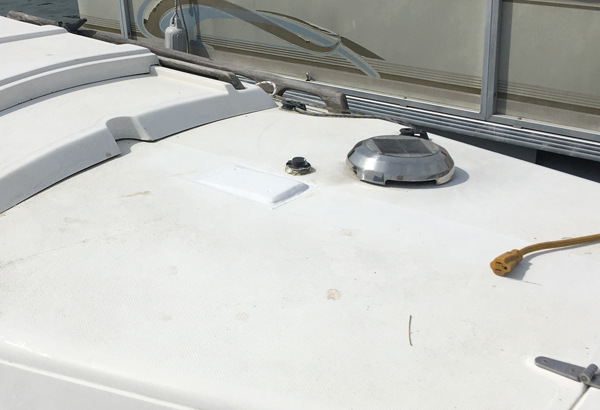
Got the mast up Friday and had a great sail yesterday. Just a great day.

.


Really looking forward to the spring sailing season.
redeye Posted - 03/29/2019 : 11:13:59
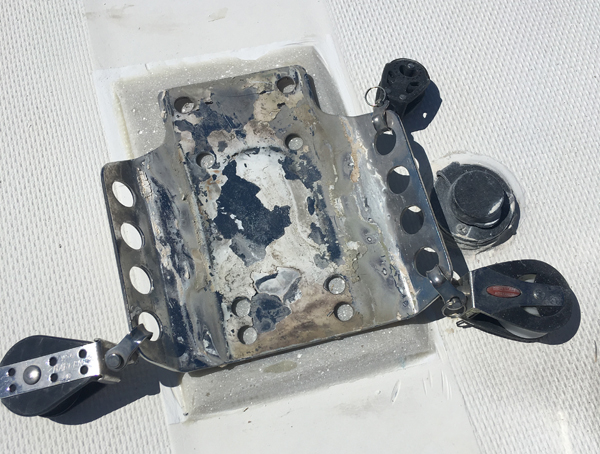
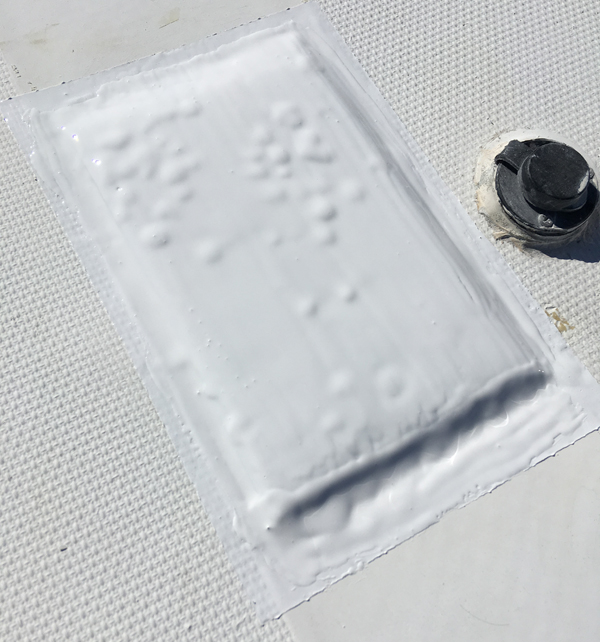
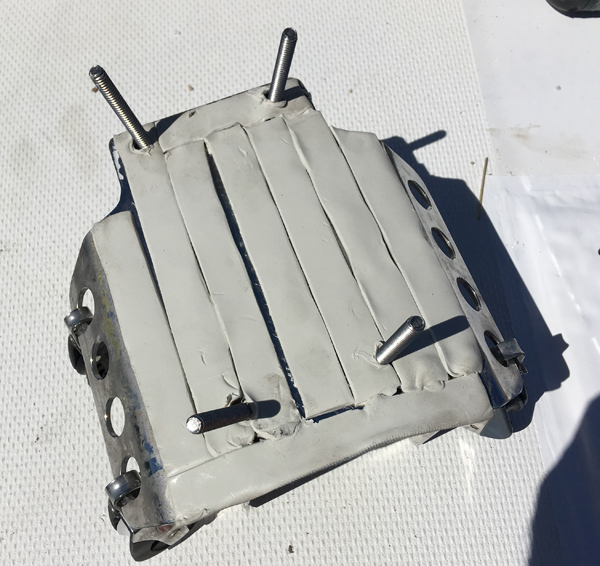
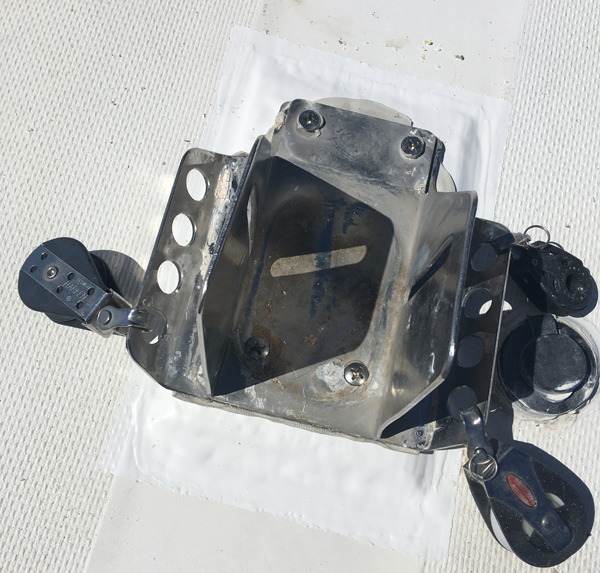
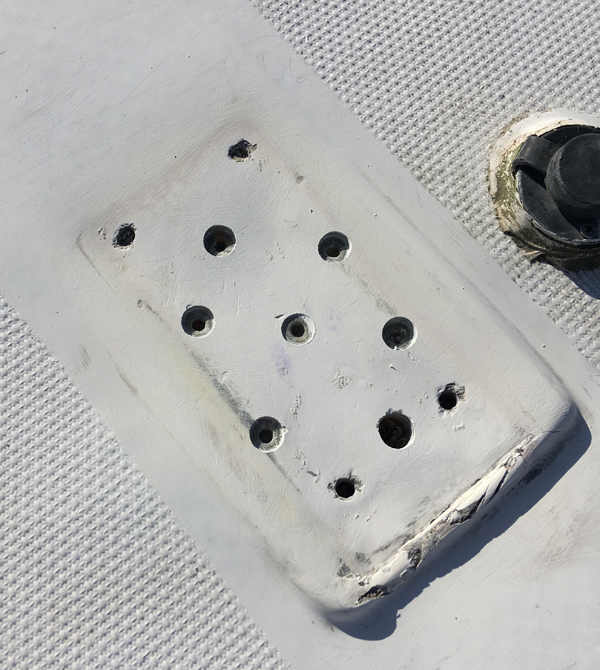
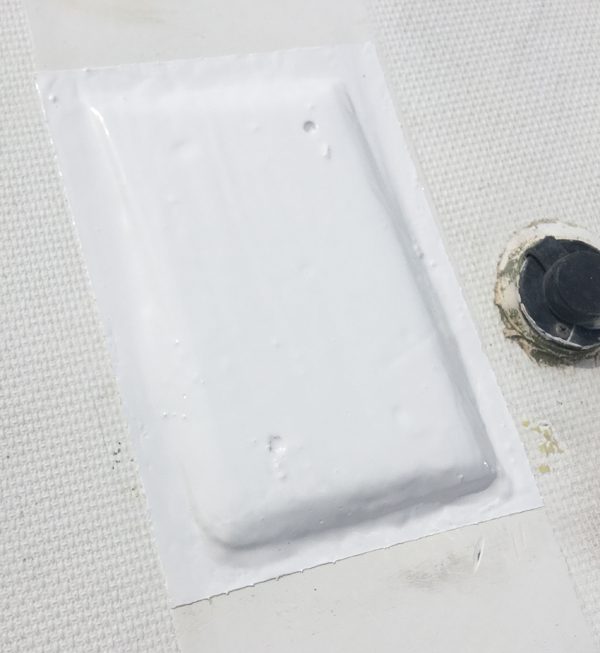
welll... got the patch sanded down and gel-coat done, butyl taped the underside of the mast plate and bolted it down... finally get to go sailing tomorrow.

.

.

.

.

redeye Posted - 03/26/2019 : 15:19:14
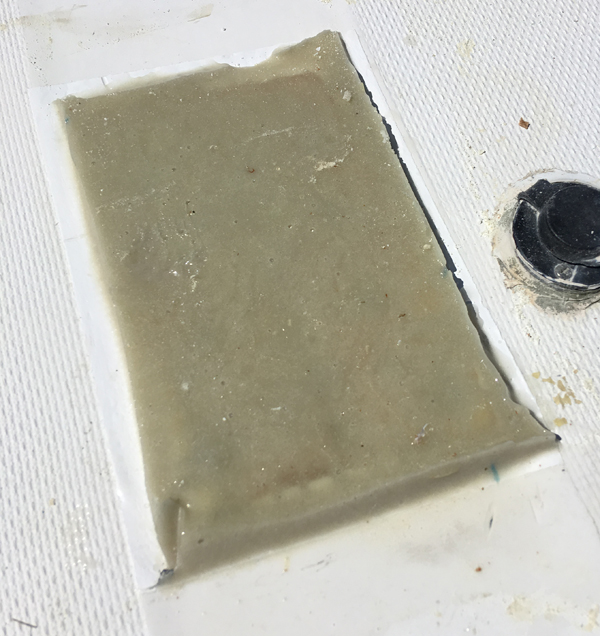
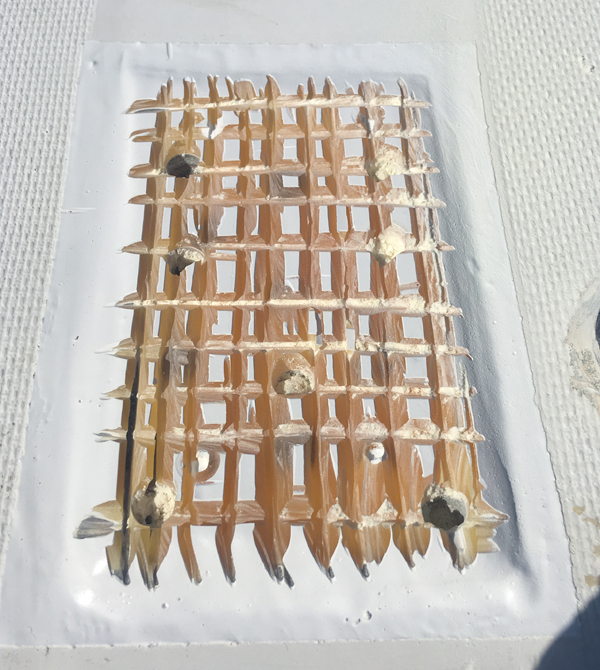
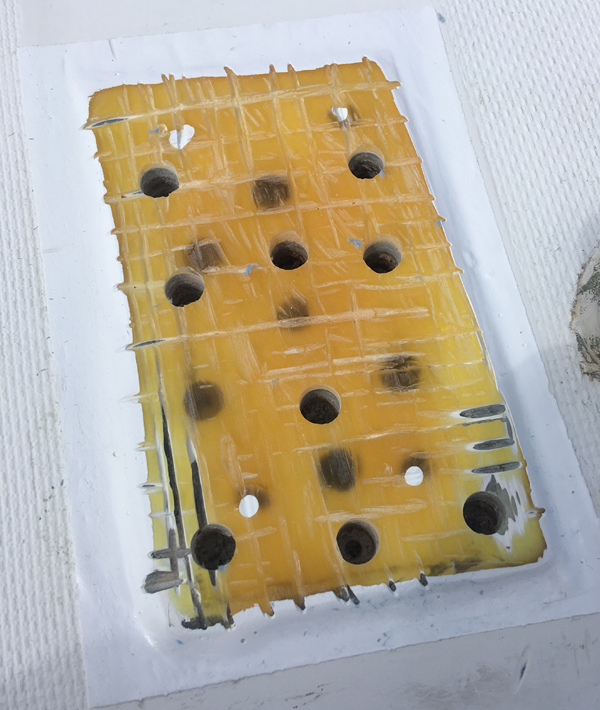
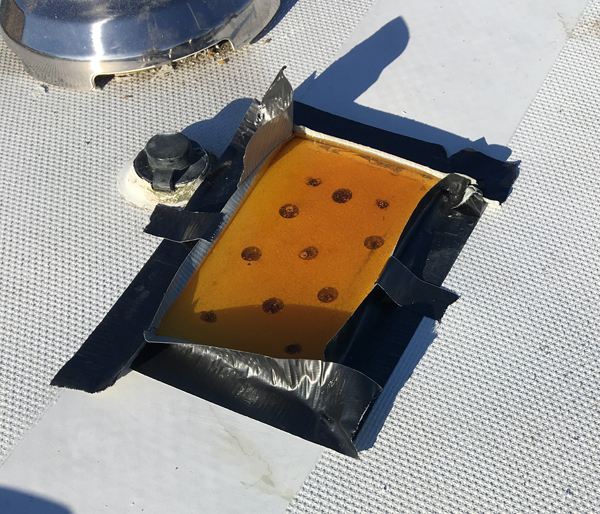
Yep ... really found the G-flex to be rather soft for a patching material of any depth, cut like butter with the cutoff tool. So I drilled it out down to the inside liner. I could feel the drill bit hit the liner after going through the wood core.

Cut out lots of the patch.

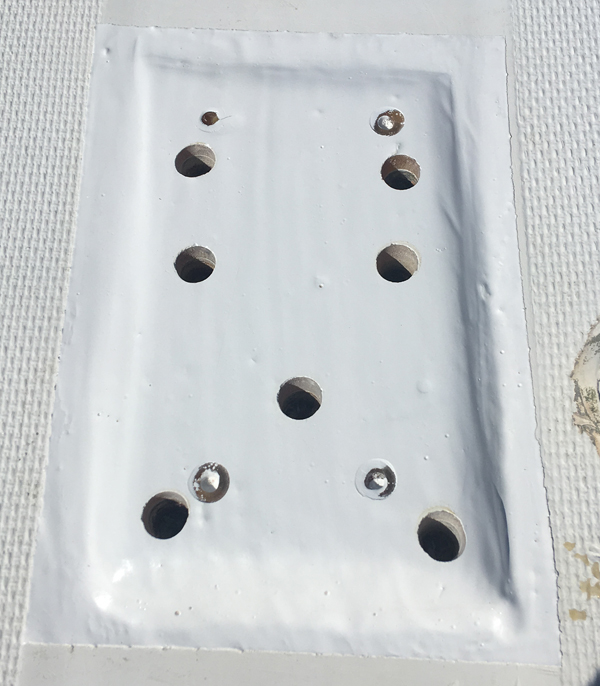
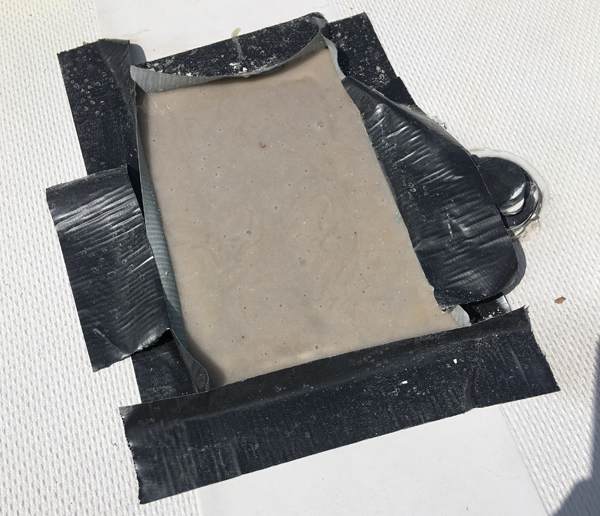
And cut out even more and sanded it down, wiped it down with MEK and drilled more holes.

built a tape dam and filled it with west systems resin with high strength filler.
Looks like the front hole is seeping into the deck, probably hafta add yet another small dab of resin...


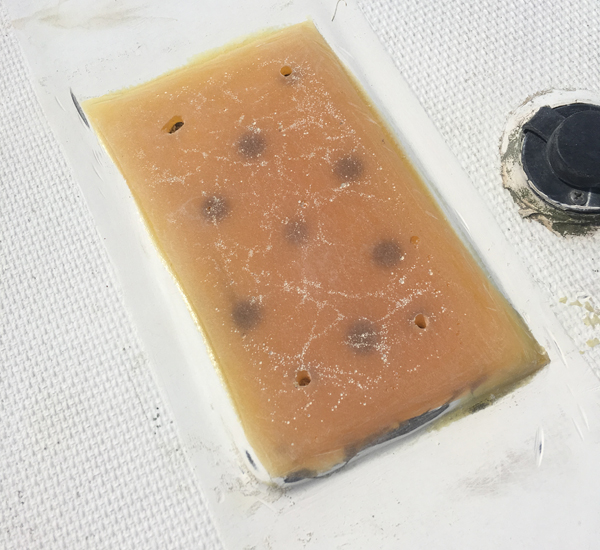
So tomorrow it will be gel-coat
redeye Posted - 03/25/2019 : 07:26:55
Now that the deck is somewhat filled with a rather elastic G-flex I hope to cut down the patch, drill down in a pattern in a gap from the other spots I previously drilled, make a larger footprint dam with metal duct tape that matches the footprint of the mast plate and fill with west epoxy 105, 206 hardener, mixed with 404 filler. Let that cure for a day and grind down, form and sand and then gel-coat.

I'm hoping this will make this patch strong enough and flexible enough to keep it from separating from the deck with the mast movement and high enough to keep it from holding water. I think it will fail if it holds water and freezes.
redeye Posted - 03/24/2019 : 20:15:44
So Anyhoo...

First use for my folding a-frame with excellent results and somehow we broke the wind vane so I've bought the bigger one with the center bird spike sticking up so that should be a fun upgrade.


Cleaned up, sanded, wiped down with MEK,and drilled out the deck, finding the wood core dry and sound so many of the holes were not that deep, concerned the resin might go everywhere into the deck. silicone plugged the underside of the bolt hole openings. Very little resin dispersed into the deck. I was kinda surprised.


Made a tape dam rectangle around the step and poured in G-flex resin. Let that cure overnight and most of the next day.


( using a portable generator, as my dock is not a power dock ) cleaned up the edges with a cut off tool and sanded with a heavy grit. Drilled the mast plate holes.


Today I taped off the area and painted 2 layers of gel-coat and its curing tonight.


.


Tomorrow we expect rain. I'm hoping Tuesday I can sand and add another layer or two of gel-coat with a little bigger footprint.

Wednesday drill out one hole, add the mast plate, mast step, and drill the other three holes one at a time with the plate and step in place, using butyl tape between the mast plate and the deck.


Then step the mast and tune the rig.

My memory for the standing rigging turnbuckle adjustments was wrong, the for and aft stays are out, with added shackles. The midstays ( lower shrouds ) are tight, and the upper shrouds are about midway.


Stinkpotter Posted - 03/19/2019 : 21:27:43
The time had come. (...long ago!)
islander Posted - 03/19/2019 : 10:05:52
Aww, Now you hurt the blue poly tarps feelings.
Stinkpotter Posted - 03/19/2019 : 08:02:19
quote:
Originally posted by redeye

...I have an aversion to the blue tarps...
FWIW, you can get them in green, brown and silver from various places, e.g. Home Dopey. I have a couple that are brown on one side and silver on the other--either is considerably less offensive to me than the standard blue.
islander Posted - 03/19/2019 : 05:12:23
I have an aversion to the blue tarps

Poly paranoia? Lol
redeye Posted - 03/19/2019 : 04:58:09
<< Drop the mast then throw a tarp over the horizontal mast. >>

Thank You! I have an aversion to the blue tarps that was keeping me from thinking of that, but of course that's a great idea, and I've got a very old camping tent I was trying to get rid of so it might become a cover with a hole cut in the bottom.
islander Posted - 03/18/2019 : 12:28:18
Drop the mast then throw a tarp over the horizontal mast. Make a nice tent to work under and keep things dry.
redeye Posted - 03/18/2019 : 10:30:20
That "not that bad" was satire... that mess of goop is gonna leak. I was clearly putting off a job, that even with dropping the mast, is not that hard.

I don't have a dry place for the boat so work is between the rains, every 5 days, mostly the weekends. I post the picture to embarrass me enough to motivate, and for others entertainment.

I kinda wish I could just set the mast step aft and work on it but that sounds like asking for a real problem.. and I want to work on the chicken vane...

So I ordered my materials from Jamestown Distributors ( lots cheeper than West Marine )

git rot, G Flex, and Gel Coat....
islander Posted - 03/18/2019 : 08:36:53
The caulk looks like it's failed and died of old age. Probably what started the problem.
redeye Posted - 03/18/2019 : 07:34:45
It just does not look that bad...

But water into the deck is Baaaaad.......

redeye Posted - 03/14/2019 : 07:41:26
And Of course thanking everyone else in advance... it helps me so much to read everyones experience... My posts are often rather simplistic compared to the actual job.

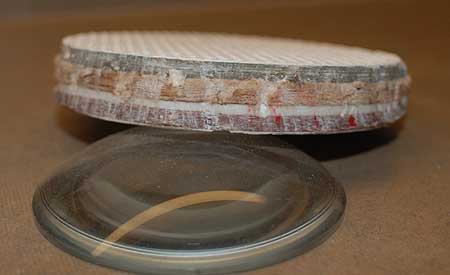
I think for my Coin I'm going with a St Michael I've had on the boat for years.
redeye Posted - 03/14/2019 : 06:50:18
Seth

Thank you for pointing me to that thread.... Yepper thats about where I'm at, it all looks similar.

Looks like I will dry it out, drill ( drimmel and sand ) it out, add dry rot, fill with Gflex and overcoat with gelcoat.

Drill for the mast plate and step the mast.

So off to the materials list....

Sounds so easy to say. I practice the steps in my head and verbally and when we start the project our ( my brother and I ) joke is:

"All We Gotta Do Is"
sethp001 Posted - 03/13/2019 : 18:24:06
You can read about my repair to similar problem at the link below, includes some photos. I filled the depression with G-flex, then covered with a thin stainless steel plate. I did not bother exploring for core rot because my mast plate bolts were still tight and the deck had no tell-tale signs of core rot.

http://www.catalina-capri-25s.org/forum/topic.asp?TOPIC_ID=30634&SearchTerms=step

Steve Milby Posted - 03/13/2019 : 14:57:52
Jamestown Distributors sells a variety of deck coring materials, including balsa core, but a man made core would be best, because some of them are not susceptible to rot. They can probably guide you to a good choice.
islander Posted - 03/13/2019 : 13:46:40
Thought of another idea. Drill a series of 1/2"-5/8" holes down to the interior liner then fill them all up with epoxy/resin creating multiple barrels of hardend epoxy/resin as a base. Then level the top with glass and resin. Might work. Like concrete footings for a building.
islander Posted - 03/13/2019 : 13:36:00
You could try Dave's idea but that involves a little major surgery and using starboard is not a good idea because it's a plastic and fiberglass won't bond to it. It would need to be something different.
Steve Milby Posted - 03/13/2019 : 13:17:47
Git Rot would be the better choice. It's more "watery" and it can flow into smaller gaps and spaces before it sets up. If the wood is really mushy, it would help to clean as much loose material out as possible with a bent nail or similar tool, and dry it out before applying the resin.
islander Posted - 03/13/2019 : 13:13:46
The Git Rot is thin like water an is supposed to permeate into the wood and then it all hardens. The wood has to be dry.
redeye Posted - 03/13/2019 : 11:30:21
<< replace the core >>

Dave.. I've got a cut out of the deck, close by where the solar vent was


so I guess the drill and fill will do the trick.

Drill one all the way through, measure and mark the drill bit, and drill the others almost through and tape off the undersides and fill with git rot, let that cure and then with Gflex resin.

And yes saturate some glass mat .... geeze I'm gonna hafta actually do some glass work... but it oughta be rather easy I can always hide it underneath the mast Plate...

Association Forum © since 1999 Catalina Capri 25s International Association Go To Top Of Page
Powered By: Snitz Forums 2000 Version 3.4.06
Notice: The advice given on this site is based upon individual or quoted experience, yours may differ.
The Officers, Staff and members of this site only provide information based upon the concept that anyone utilizing this information does so at their own risk and holds harmless all contributors to this site.